
Heavy-duty fence gate hardware guide: hinges and latches
Affiliate disclosure: Product links below are Amazon affiliate links. As an Amazon Associate we earn from qualifying purchases, at no extra cost to you. We have not hands-on tested this hardware; specs are the sellers' own claims on the live listings as of October 31, 2026. See our affiliate disclosure.
Last reviewed: October 31, 2026.
A gate is the only part of a fence that moves, so it takes all the abuse: it gets pushed, slammed, leaned on and left open in the wind. When a gate starts dragging on the ground or the latch stops catching, most people reach for a bigger hinge. Sometimes that's the fix. Often the real problem is the post, the frame or the brace, and new hardware only buys a few months. This guide walks through the whole gate, from the post to the latch, so the hardware you buy actually solves the problem.
Why gates sag
A swinging gate hangs off one side. All of its weight pulls the top hinge away from the post and pushes the bottom hinge into it, while the free (latch) side tries to drop. Over time that leverage shows up in a few predictable places:
- The hinge post leans. If the post is too shallow or the soil is soft, the whole gate tips toward the latch side. New hinges won't fix a leaning post.
- The frame racks. Without a diagonal brace, a wood gate frame slowly turns from a rectangle into a parallelogram and the latch corner drops.
- Hinges or fasteners give up. Light hinges bend, and screws pull out of soft or weathered wood, especially on wide or heavy gates.
- Corrosion. Rusted pins and plates bind, and the wrong fasteners in treated lumber can corrode faster than expected (more on that below).
Quick check: close the gate and hold a level against the hinge post. If the post is plumb but the latch corner has dropped, look at the frame and hinges. If the post leans, fix the post first.
Start with the posts
Gate posts carry far more load than line posts. A Home Depot gate-building instruction sheet recommends setting gate posts deeper than the rest of the fence line, at about one-third of their total length, anchored in concrete, and plumbing them so their inside faces are exactly parallel. The same sheet calls for leaving about 1/4 to 3/4 inch of clearance between the gate and the posts so the gate swings freely. Leave too little and the gate binds once the wood swells in wet weather.
Square the frame and add the right brace
For a wood gate, check that the frame is square by measuring both diagonals. When they're equal, the frame is a true rectangle. Then add a diagonal brace that runs from the bottom of the hinge side to the top of the latch side. Set that way, the gate's weight pushes down along the brace into the bottom hinge and the hinge post, instead of letting the latch corner fall. Install the brace backward (top hinge to bottom latch) and it does little to stop sag. Use exterior screws and exterior wood glue rather than nails at the joints.
A steel cable with a turnbuckle works the other way. It pulls rather than pushes, so it runs from the top of the hinge side to the bottom of the latch side. It's a handy way to lift an existing sagging gate without rebuilding it.
Hinge types
- Strap and T-hinges. These are the classic long flat straps that screw across the gate rails. They spread the load along the rail and suit most pedestrian gates. Longer straps resist sag better than short butt hinges.
- Heavy-duty bolt-on bearing hinges. These are thick steel plates with a sealed ball bearing at the pivot. They're designed to be through-bolted to the gate and post (or welded on metal gates) and suit heavy, wide or driveway gates. The bearing keeps a heavy gate swinging smoothly, and bolts don't pull out the way screws can.
- Spring and self-closing hinges. These pull the gate shut on their own. They pair well with a self-latching latch when a gate must not be left open (a pool gate or a gate that keeps pets in).
About weight ratings: hinge listings quote a capacity, usually for a pair. Treat it as the seller's claim, not a lab number. A wide gate puts much more leverage on the top hinge than its weight alone suggests, so buy well above your gate's weight and use the bolt size the hinge was designed for. Three hinges on a tall gate spread the load further.
Latch types
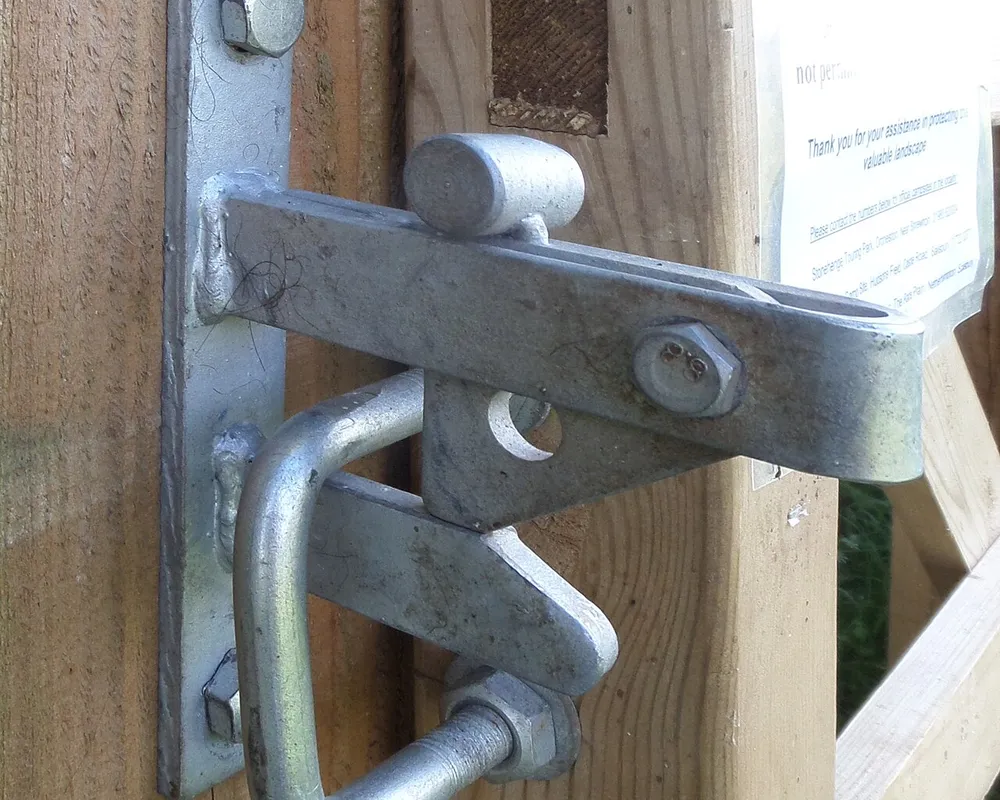
- Gravity (self-latching) latches. A bar or lever drops into a catch as the gate closes. Most garden-gate latches work this way, including thumb latches that release with a push of the thumb from the outside.
- Ring or lever latches. You turn a ring or lift a lever to open. These are simple and sturdy but usually need a hand to close.
- Padlockable latches. Look for a hole or hasp sized for a padlock if the gate guards a side yard, a pool or tools.
- Pool-gate latches. These are purpose-built for pool barriers (see the next section). A general thumb latch is not a substitute.
For any latch, line up the catch with the gate closed and level, and use the longest fasteners the wood allows. The latch takes a hit every time the gate slams.
Pool gates: follow the barrier rules
If the gate is part of a pool or spa fence, the hardware has a safety job. The U.S. Consumer Product Safety Commission's Safety Barrier Guidelines for Residential Pools (Publication 362) recommends:
- Pedestrian gates should open outward, away from the pool, and be self-closing and self-latching. If a child pushes on a gate that isn't fully shut, they push it closed.
- If the latch release is less than 54 inches from the bottom of the gate, put the release on the pool side, at least 3 inches below the top of the gate.
- Keep any opening in the gate and barrier to 1/2 inch or less within 18 inches of the release, so a child can't reach through and open it.
Many states and cities have written these guidelines into their building codes, so check your local rules before you buy. The thumb latch we list below is a general-purpose gate latch, not a pool-barrier latch.
Fasteners and treated lumber
Most wood fences use pressure-treated posts. Simpson Strong-Tie notes that testing has shown some of the newer wood treatments to be more corrosive to steel than the older CCA treatment, and that the treated-wood industry recommends hot-dip galvanized or stainless steel fasteners and hardware with treated wood. Don't mix the two: galvanized and stainless steel are dissimilar metals, and the zinc corrodes faster where they touch. Electroplated "zinc" screws are not hot-dip galvanized. Bolts that come with a hinge or latch are often not included or not rated for treated wood, so check before you buy.
Upkeep that keeps a gate swinging
- A few times a year, tighten loose bolts and screws, and re-drive any screw that spins with a slightly longer one.
- Lubricate hinge pins or bearings (some heavy hinges have oil ports for this).
- Check that the latch still catches without lifting the gate. If you have to lift, the gate has started to sag.
- Keep a cable-and-turnbuckle kit in mind as a quick fix for a wood gate that has dropped a little.
Curated gate hardware (2)
Two products only: one heavy-duty hinge pair and one everyday latch. Prices were checked on the live Amazon listings on October 31, 2026 and change often.
- Insaga 6.7″ Heavy Duty Gate Hinges, 1,100 lb capacity (2-pack), about $39.89 for the pair. This is the pick for heavy wood or metal gates. The listing describes 6 mm black e-coated carbon steel plates with sealed ball bearings, a claimed 1,100 lb capacity per pair, oil-injection ports, steel shims and locking screws to take out play. Each hinge is 6.7 in long by 1.5 in wide and weighs about 2.9 lb. It mounts with 1/2-inch bolts (not included) or can be welded to a metal gate if you strip the coating first.
- Hillmaster Self-Closing Thumb Gate Latch, about $19.99. This is the everyday self-latching pick. The listing describes heavy-gauge steel with a black powder coat over zinc plating, a gravity latch that catches as the gate closes and a thumb-button release. It works on in- or out-swinging gates up to 3 in thick, left- or right-hand. Mounting fasteners are included (the seller suggests harder screws for metal gates), and the latch can take a padlock (not included). It suits wood, vinyl and metal gates. It's not a pool-barrier latch.
Amazon links above are affiliate links. As an Amazon Associate we earn from qualifying purchases. Capacity and material figures are the sellers' claims; we haven't measured them.
Where this fits in the house
The side gate is a common way into a backyard, so pair good hardware with light. Our solar motion security light guide covers wire-free lights for gates and side yards. If the gate leads to the driveway, see the garage door opener with battery backup guide too. All our picks are on the Products page.
Bottom line
Fix the gate from the ground up. Make sure the hinge post is deep, set in concrete and plumb, then square the frame with a brace running from the bottom of the hinge side to the top of the latch side. After that, match the hinges to the gate: strap hinges for a light garden gate, through-bolted bearing hinges for a heavy or wide one. Use a self-latching latch where the gate needs to stay shut, and a true pool-barrier latch where the code requires one. Use hot-dip galvanized or stainless fasteners in treated wood.
Sources
- U.S. CPSC: Safety Barrier Guidelines for Residential Pools (Publication 362) (outward-opening, self-closing, self-latching gates; 54-inch, 3-inch and 1/2-inch latch guidance)
- Home Depot instruction sheet: Build and hang the gate (post depth, gate clearance, squaring the frame, brace direction)
- Simpson Strong-Tie: Preservative-Treated Wood FAQ (hot-dip galvanized or stainless fasteners; don't mix them)
- Amazon listings for ASINs B0DXZW7Z34 (Insaga 6.7″ heavy-duty gate hinges) and B09NVQ5RWX (Hillmaster self-closing thumb gate latch): specs and prices (checked October 31, 2026)
Information only; not professional advice. Check local building and pool-barrier codes. Heavy gates are awkward to lift, so get a helper when you hang or rehang one.