
How to flush a tankless water heater: a DIY descaling kit guide
Affiliate disclosure: Product links below are Amazon affiliate links. As an Amazon Associate we earn from qualifying purchases, at no extra cost to you. We have not hands-on tested these kits; specs are the sellers' own claims on the live listings as of October 31, 2026. See our affiliate disclosure.
Last reviewed: October 31, 2026.
Safety first: a tankless water heater combines water under pressure, hot surfaces, household electricity and, on gas models, a gas supply. Always shut off the power and the gas before you start, let the unit cool, and follow your own model's installation and operation manual. Its steps, valve labels, cleaning solution and timing override anything general, including this guide. If your unit doesn't have service (isolation) valves, or anything here is unclear, hire a licensed plumber or the manufacturer's service network.
A tankless (on-demand) water heater heats water as it flows through a heat exchanger. When the water is hard, minerals such as calcium and magnesium come out of solution as scale on those hot surfaces. A U.S. Department of Energy Building America measure guideline explains that scale in the heat exchanger restricts flow and can shorten the unit's life. Flushing, also called descaling, circulates a mild acid through the heat exchanger to dissolve that scale. With the right kit, it's a job many homeowners do themselves.
How often to flush
There isn't one answer. It depends on your water hardness, the temperature setting and how much hot water you use:
- Navien says to descale at least once a year, and more often with more minerals in the water, a higher temperature setting or heavier use.
- Rheem's installation guidance recommends flushing every year to year and a half.
- The DOE guideline notes that manufacturers' recommended intervals range from twice a year to once every three years, depending on water quality.
- Many units tell you themselves. Rinnai manuals describe a scale warning code (LC on many models) and a "Service Soon" indicator on some, and note that lime-scale damage isn't covered by the warranty.
Hard water matters. The DOE guideline notes that above roughly 8 to 14 grains per gallon (about 136 to 239 ppm) of hardness, manufacturers may require a water softener or treatment to protect the warranty. Hard water is common across much of the country. If you don't know your number, a hardness test kit or your utility's water quality report will tell you (see the links at the bottom).
What you need
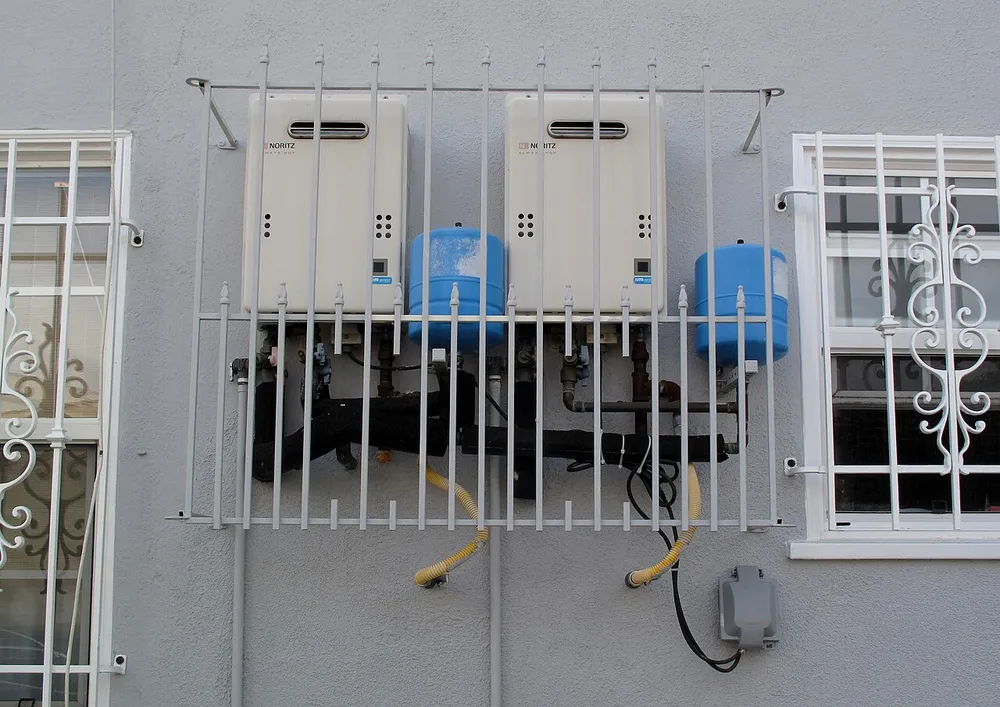
- Service (isolation) valves on the hot and cold lines at the heater, each with a small hose port. Most flushing procedures depend on them. Rheem and Rinnai both describe them as part of the setup, and Rheem sells a kit for them. Without them, call a plumber to install them first.
- A small submersible pump. Kits typically use a 1/6 HP utility pump.
- Two or three washing-machine-style hoses: one from the pump to the cold service port and one from the hot service port back to the bucket. Navien's procedure lists three hoses.
- A bucket big enough for the solution. Rinnai's procedure calls for about 4 gallons of solution, Rheem's for about 5 gallons, and Navien calls for a bucket of 5 gallons or larger.
- The cleaning solution your manual allows. Rinnai's consumer flushing page calls for undiluted white vinegar and warns never to use chemical solutions. Some Rinnai manuals allow food-grade white vinegar or citric acid. Navien allows white vinegar or an approved descaler. If your manual names a specific product, use it.
- Gloves, eye protection, towels and a flashlight.
Step by step (general outline; your manual wins)
- Cut the power. Unplug the unit or switch off its breaker. Rinnai's Sensei flush bulletin points out that pressing the controller's ON/OFF button is not the same as disconnecting power.
- Shut off the gas at the manual gas valve (gas models). Rheem warns that damage can occur if you flush with the gas and power still on.
- Close the main hot and cold water shutoffs at the heater so the flushing loop is isolated from the house.
- Relieve pressure. Remove the caps on the service-valve ports slowly. Rinnai warns that some water will come out and it may be hot.
- Connect the hoses. Run the pump's outlet hose to the cold-side service port. Connect a second hose from the hot-side service port and put its end in the bucket.
- Add the solution to the bucket, set the pump in it and open both service ports.
- Circulate. Run the pump for the time your manual gives. Navien and many Rinnai manuals say at least 45 minutes, and Rinnai's Sensei bulletin says about an hour. Rheem's procedure gives 45 to 60 minutes.
- Rinse. Turn off the pump, take the hot-side hose out of the bucket and put it in a drain or a separate container, empty the bucket, then open the cold water supply and run fresh water through the unit. Most manuals say about 5 minutes; Navien's descaling article says at least 10 minutes.
- Clean the cold water inlet filter or screen if your model has one. Rinnai, Navien and Rheem all include this step.
- Restore service. Close and cap the service ports, open the main hot and cold shutoffs, then open a hot tap and let it run until the air is out (Rinnai suggests 2 to 3 minutes). Only then turn the gas back on and restore power.
- Dispose of the used solution. Rinnai's bulletin says to discard the vinegar after a flush and not reuse it.
Navien's own manual cautions that descaling is "somewhat complicated" and that maintenance done wrong can void the warranty. Rinnai manuals also recommend an annual inspection by a qualified professional. A DIY flush doesn't replace that inspection of venting, gas and combustion.
Picking a flush kit
- Bucket size vs. your manual. If your manufacturer calls for 4 to 5 gallons of solution, a 3-gallon pail is too small for that recipe. Use a 5-gallon bucket instead.
- Is the solution included? Some kits include a descaler and some don't. Vinegar is inexpensive and widely available, but only use it if your manual allows it.
- Pump temperature limit. Small utility pumps often have a maximum fluid temperature, so let the heater and lines cool before you start.
- Hose length. Make sure the hoses reach from the bucket on the floor to the valves under a wall-mounted unit.
Curated flush kits (2)
Two products only: a complete kit with descaler and a budget pump kit. Prices were checked on the live Amazon listings on October 31, 2026 and change often.
- Chromex Tankless Water Heater Flush Kit with NSF-Certified Descaling Solution and 1/6 HP Pump, about $134.99. This is the everything-included pick. The listing describes a 6-piece kit: a 5-gallon bucket with lid, a 1/6 HP pump, two PVC-coated 6 ft hoses, an elevated pump grate and a citric-acid descaler certified to NSF/ANSI/CAN 60. The seller lists compatibility with major brands including Rinnai, Navien, Rheem, Noritz, Takagi and Bosch. Rinnai owners should still check whether their manual allows citric acid or calls for vinegar only.
- 6699 Tankless Water Heater Flushing Kit (1/6 HP Pump, 2 Hoses, 3-Gallon Pail), about $84.99. This is the budget pick. The listing describes a 1/6 HP, 115 V pump rated at 1,100 GPH, two 6 ft by 1/2 in hoses with washers and a 3-gallon pail with lid opener. The pump's maximum fluid temperature is 95°F, so let the unit cool first. No descaler or vinegar is included, and the 3-gallon pail is smaller than the 4 to 5 gallons some manufacturers specify. Some buyers mention durability complaints in the reviews.
Amazon links above are affiliate links. As an Amazon Associate we earn from qualifying purchases. Kit specs are the sellers' claims; we haven't measured them.
Where this fits in the house
Flushing treats the symptom. Softer water treats the cause. Use our water softener sizing calculator to size a softener, read salt-based vs salt-free softeners before you buy, and see filter vs softener vs RO for how the systems differ. To find your hardness number, see how to read a water quality report for hardness or test it yourself with a kit from our water testing picks. Both flush kits are on the Products page.
Bottom line
Flush a tankless heater on the schedule your manufacturer gives, and sooner if your water is hard or the unit shows a scale code. Make the job safe: disconnect power, shut off gas and water, relieve pressure slowly and use only the solution your manual allows. If your unit has service valves, a pump kit and about an hour make this a manageable DIY job. If it doesn't, have a plumber add them, and keep the yearly professional check either way.
Sources
- Rinnai: Flushing my Rinnai tankless water heater (power and gas off, relieve pressure, 4 gallons undiluted white vinegar, no chemical solutions, purge air)
- Rinnai Value Series Installation and Operation Manual (scale codes, isolation valves, flushing steps, inlet filter)
- Rinnai VA Indoor Installation and Operation Manual (food-grade white vinegar or citric acid, at least 45 minutes)
- Rinnai Technical Bulletin TB-188: Sensei enhanced flush procedure (unplug power, about one hour, discard used vinegar)
- Navien NPE-2 User's Information Manual (descaling caution, bucket and hoses, at least 45 minutes, inlet filter)
- Navien: How to descale tankless water heaters (at least once a year, factors that increase frequency, rinse at least 10 minutes)
- Rheem tankless water heater installation guide (flush every year to year and a half; isolation valves)
- Rheem tankless de-liming (flushing) procedure (copy of Rheem document: power and gas off, about 5 gallons vinegar, 45–60 minutes, clean inlet screen)
- U.S. DOE Building America: Measure Guideline for tankless water heaters (scale effects, flushing intervals, hardness levels where softening may be required)
- Amazon listings for ASINs B084GFD3NN (Chromex flush kit) and B0BTNX6YWM (6699 flushing kit): specs and prices (checked October 31, 2026)
Information only; not professional advice. Always follow your water heater's manual. Gas, electrical and venting work belongs to licensed professionals.